Through time I wrote a few tutorials for macramé techniques at my blog. In each blog post I explained how to make a certain plant hanger. But that way it is not that easy to find the instructions for a specific technique. Therefor I decided to write this blog post. It is a collection of all explained techniques with links towards the blog post were you can find all instructions.
Have fun while making stunning pieces of macramé!
Opstart/the beginning
Je kan de koorden voor de macraméhanger vastmaken aan een ring.
Dat kan met een ring van metaal, plastiek of hout. Ik vind het zelf tof om houten ringen te decoreren met de houtbrander.
To be able to hang a macramé plant hanger, it must have a loop.
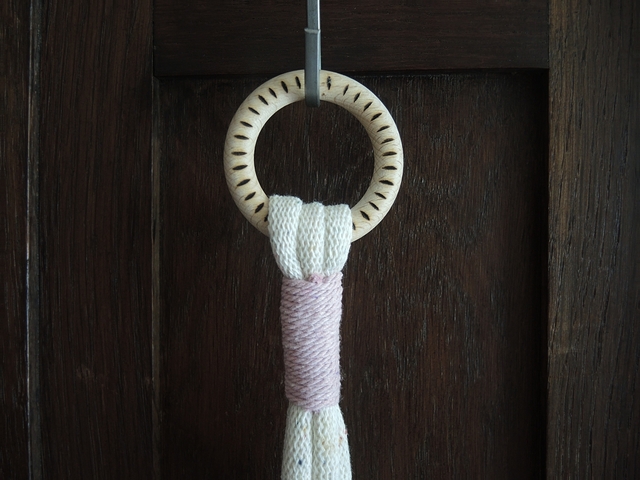
One way to provide a loop is by attaching the ropes onto a ring. That ring can be made of metal, plastic or wood. I like to decorate the wooden ones with a wood burner.
Of je maakt zelf een lus van koord.
But it is also possible to make a loop with rope.
Als je kiest voor een ring, dan moet je de koorden daar aan bevestigen. Dat kan op verschillende manieren.
Je kan een wikkelknoop gebruiken.
When you choose to work with a ring, you have to attach the ropes onto it. There are different ways to do that.
You can use a wrapping knot....
Of je doet het zo.
Or you start this way.
Je kan ook deze fantasieknoop gebruiken om te starten. Met deze knoop start je hanger met een dikker stuk gemaakt met alle draden samen. Hier lees je de instructies.
You can also use this fantasy knot to start. The first bit of your hanger is a piece where you use all your ropes in one fantasyknot. I explained this technique here.
Deze opstart ziet er wat ingewikkelder uit maar is het eigenlijk niet. Hier lees je hoe je dit doet.
This beginning looks a bit more complicated but it is not that difficult. Here you can read how to make this one.
De knopen/knots
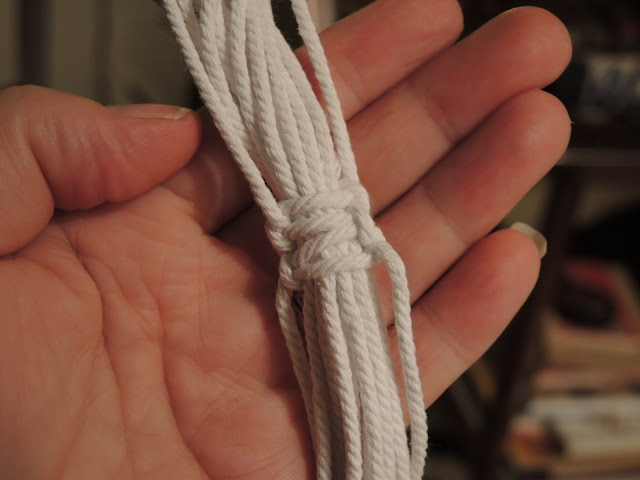
De wikkelknoop/wrapping knot
De wikkelknoop is een heel eenvoudige knoop die door gebruik van een los eindje touw kan gebruikt worden om verschillende draden samen te binden. Hij wordt vaak gebruikt om een macraméhanger te beginnen en/of te eindigen door alle draden met deze knoop bij mekaar te brengen.
Maar je kan hem ook gebruiken om macramé te decoreren met een accentkleurtje bijvoorbeeld.
Hier de instructies.
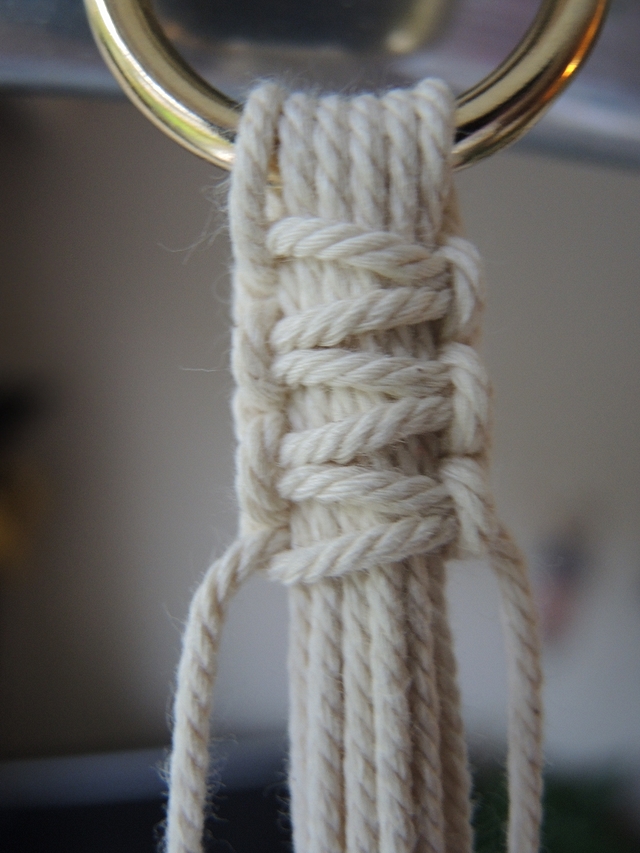
The wrapping knot is a very easy and simple knot. It uses a piece of cord to bind together a few ends of rope.
This knot is often used to start or end a plant hanger by collecting all pieces of rope and binding them together.
But you can also use it to decorate your piece of macramé with a colour accent.
Find the instructions here.
Halve weitasknoop of spiraal knoop/half square knot or spiral knot
Dit is eigenlijk de basisknoop in macramé. Hier lees je hoe je hem maakt.
This is the basic knot in macramé. You can read how to make it here.
Weitasknoop/square knot
Dit is ook een basisknoop en eigenlijk een uitbreiding van de spiraalknoop. De instructies staan in deze blogpost.
This also is a basic knot in macramé and it is actually a variation of the half square knot. I explained this knot in this blog post.
Fantasieknoop met gaten/fantasy knot with holes
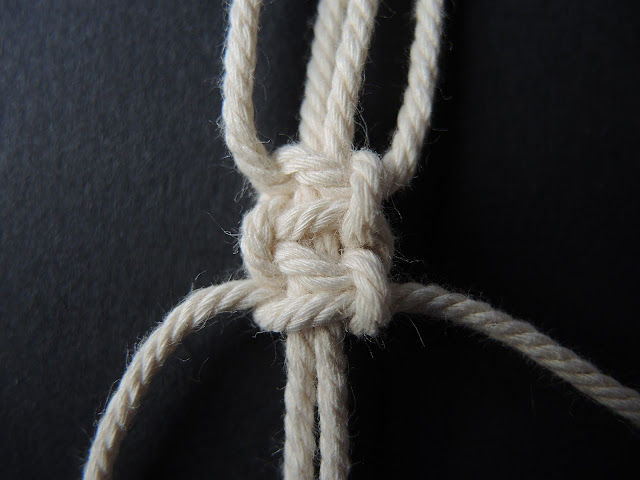
Dit effect bereik je gewoon met de weitasknoop. Hier lees je er alles over.
For this effect you just use the square knot. You can read all about it here.
Fantasieknoop met lusjes/fantasy knot with loops
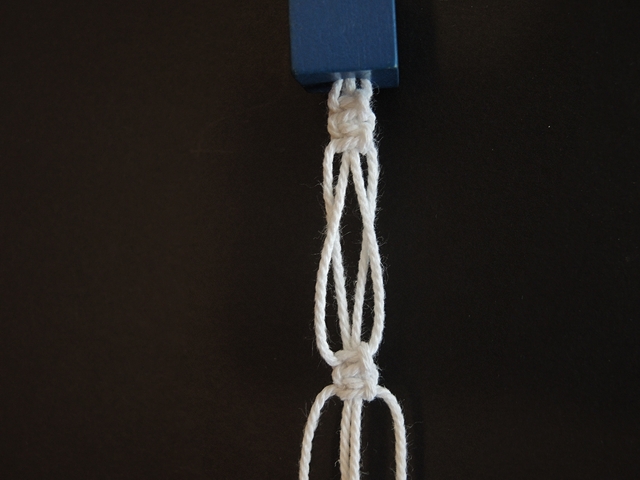
Met deze techniek krijg je een plezant effect. Je kan er eindeloos mee variëren door meer of mindere lusjes te gebruiken of ze groot of klein te maken. Hier de instructies.
A funny result with the technique you can read here. You can make endless variations with this one: more or less loops, bigger or smaller ones ...
Fantasieknoop: weitasknoop met gedraaide draden/Fantasy knot: square knot with twisted ropes
Fantasieknoop met 8 draden/fantasy knot with 8 strings
Bij deze knoop worden telkens verspringend van plaats een aantal weitasknopen gemaakt. Hier de instructies.
This is a variation with the square knot: make a row of square knots and repeat this at another place . Instructions here.
Afwerking/finishing
De meest evidente manier om de hanger af te werken, is met een wikkelknoop.
The most obvious way to finish a plant hanger is by using an wrapping knot.
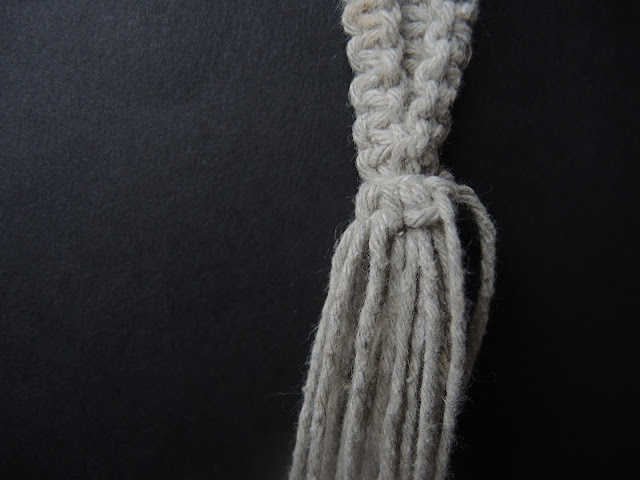
Of je kan eindigen met een paar weitasknopen rond alle draden zoals ik hier deed.
Or you can end by making some square knots around all pieces of rope as I did with this one.
Als variatie daarop kan je ook eindigen met weitasknopen die je maakt met verschillende werkdraden ipv zoals gewoonlijk met een enkele draad. Ik deed het hier.
Variation: use more than 1 rope to make some square knots. I used this technique here.
Zeker als je wat dunnere draad gebruikt kan het flosje op het einde wat schraal tonen.Maar ik heb een truuk om het voller te maken. Je leest het hier.
When using somewhat thin cord, the tassel at the end can look a bit thin. But I have a trick to give it more volume.
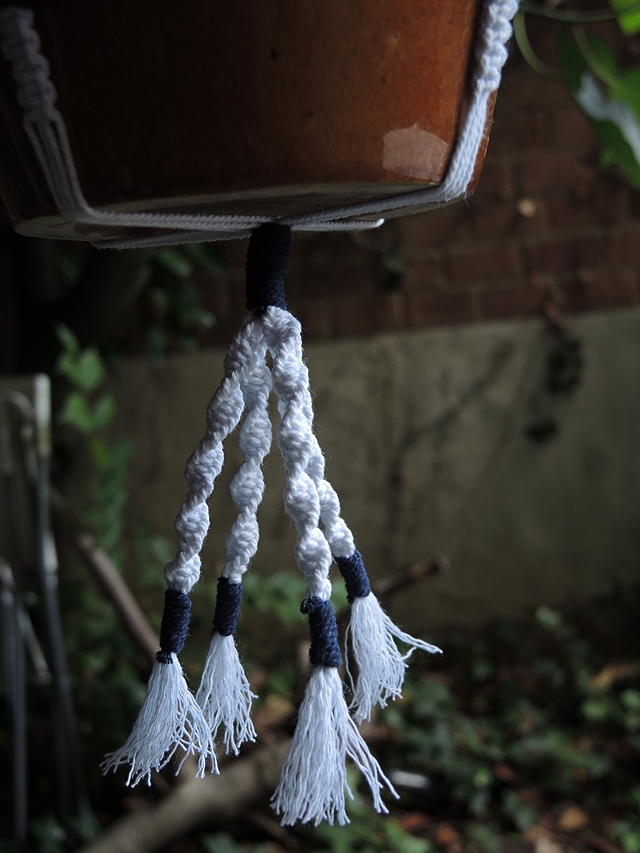
In plaats van gewoon de draadjes te laten hangen en zo een flosje te creëren , kan je ook een flosje maken van macramé. Hier legde ik uit hoe je dat doet.
Instead of just leaving the loose ends and by doing that automatically creating a tassel, you can also make a tassel with macramé. I explained this technique here.
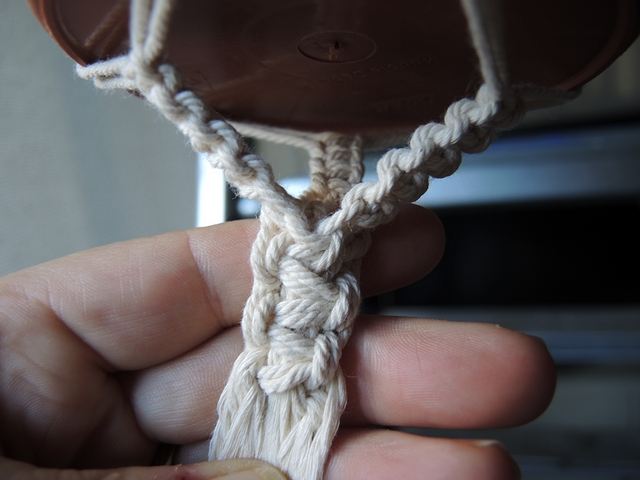
Ik bevestigde ook eens de hanger rechtstreeks aan een keramieken hangpotje. Hier kan je zien hoe ik dat deed.
Once I attached the plant hanger onto a ceramic pot with holes. For the technique: look here.
Extra versiering/extra decoration
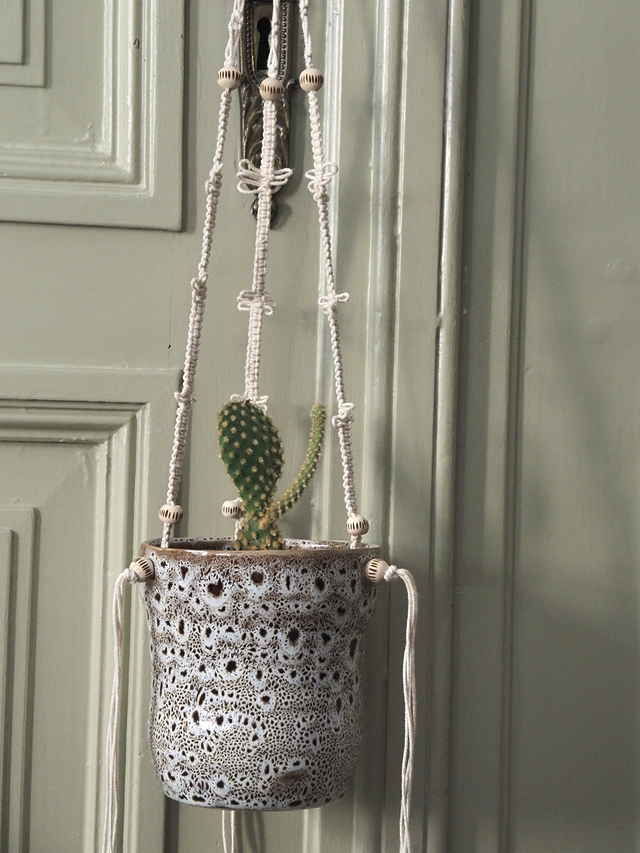
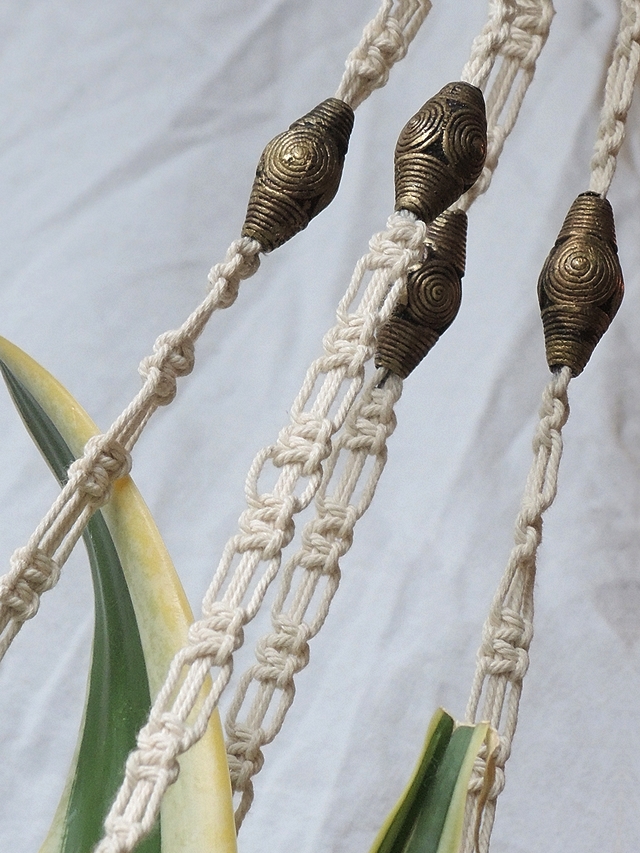
Kralen zijn de gedroomde extra decoratie die je kan gebruiken bij macraméhangers. Maar dat klinkt makkelijker dan het vaak is want het is niet altijd eenvoudig om het koord doorheen de kralen te krijgen.
Hier lees je wat tips over hoe je dat kan doen...
Beads are the most obvious way to add some decoration onto your plant hanger. But it sounds easier than done. It is not that simple to actually get the ropes through the holes of the beads. Often the holes are too small. Here you can read some tips about how I do that.
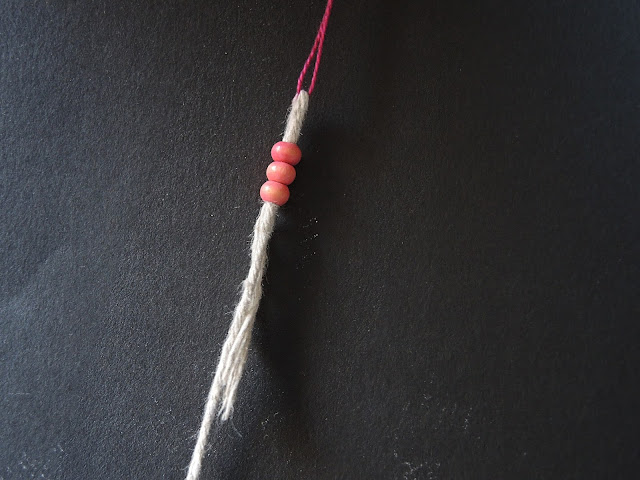
En hier lees je nog een techniek om het toevoegen van kralen te vergemakkelijken.
And here you can find another technique to make it easier to add some beads.
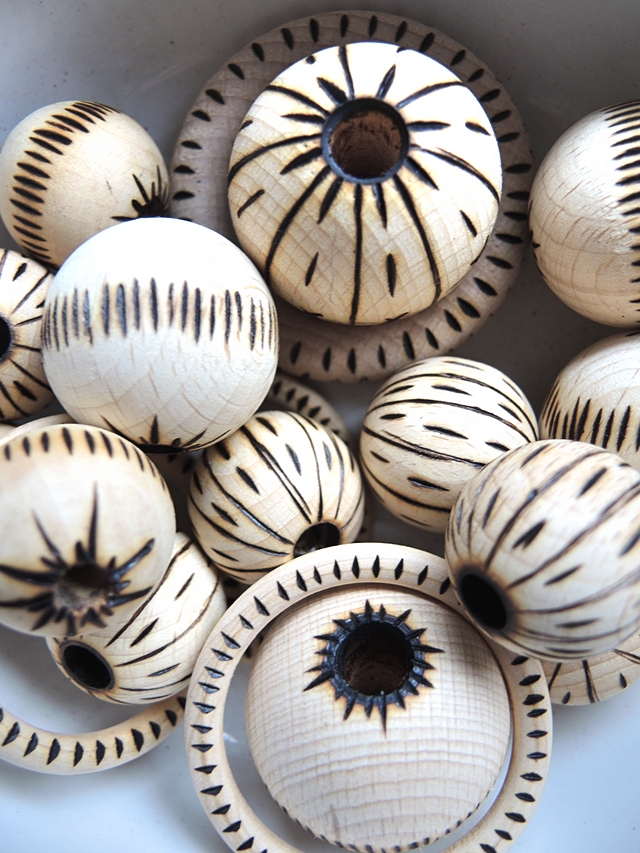
Ik blijk de hangers met kralen die ik ook nog eens bewerkte met de houtbrander het mooiste te vinden. De combinatie van de natuurlijke materialen en kleuren van het touw en het hout met de ingebrande motieven vind ik - al zeg ik het zelf - bijzonder geslaagd. Hier kan je lezen hoe ik die kralen decoreerde.
I notice I love the plant hangers with wood burned beads most of all. I really love the combination of the natural look of the material with the burnt patterns of the beads. You can find the instructions for wood burnt parts here.
Je kan houten kralen ook gewoon een kleurtje naar je eigen smaak geven met wat verf. Daar schreef ik ooit deze tutorial over.
You can give wooden beads a color of your own choice. Some years ago I wrote a tutorial about painted beads.
En natuurlijk kan je ook andere dingen maken van macramé dan plantenhangers;
Zo gebruikte ik al macramétechnieken in juwelen, bij deze oorbellen en bij deze armband.
And of course you can make other things with macramé besides plant hangers.
I made some earrings and a bracelet with it.
Via deze tag vind je al mijn macraméblogposts op een rijtje.
Use this tag for a list of all my macramé blog posts.
- Ik heb een reclame- en sponsorvrije blog en kreeg niks in ruil voor de aankoop van deze kralen. Ik kocht ze op eigen initiatief en betaalde de volle pot. / I have an add- and sponsor free blog and I bought these beads at full price at my own initiative and without any form of compensation or writing this blog post.
- Lees dit voor mijn regels rond gebruik en copyright voor mijn ontwerpen/ More info about my rules for copyright on my designs










Mooi mooi mooi, allemaal even mooi! En die gebrande kralen zijn ook al zo tof.
BeantwoordenVerwijderenIk vind dat dus echt een supermooie combinatie hé, die kralen met macramé. Ik ga dat zeker nog doen!
VerwijderenWhat a lot of great information, thanks.
BeantwoordenVerwijderenHave fun using it!
VerwijderenFantastic post! It will be featured in tomorrow’s Creative Compulsions.
BeantwoordenVerwijderenMichelle
https://mybijoulifeonline.com
Thanks Michelle!
Verwijderen