Ik heb er zo al heel veel gemaakt en heb altijd een voorraadje in huis: ik gebruik ze vooral om oorbellen in te stoppen.
Vandaag haal ik deze tut uit 2011 nog eens boven om hem te vertalen naar het Engels...
Today I translate a tutorial I wrote in 2011 : cute small round gift bags.
I made a lot of them in the past years : they are very handy for wrapping earrings or other small gifts....
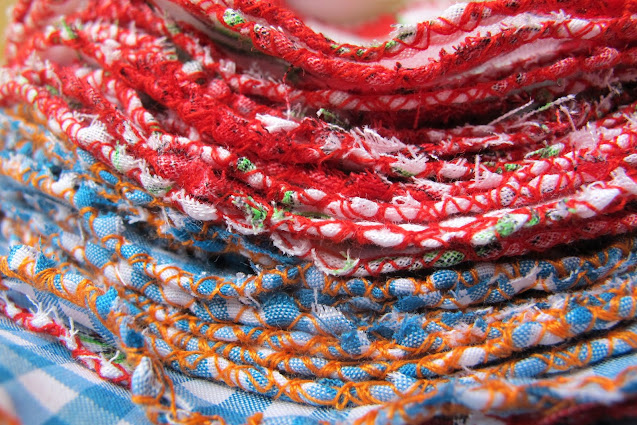
Deze keer ( schreef ik in 2011 hé, het is hier een vertaling van een oud artikel ) maakte ik de kadozakjes in blauw/witte "karookesstof" met oranje draad en in een stofje met aardbeien met rode draad.
This time ( = in 2011 ;) ) I made the gift bags of fabric with white and blue squares combined with orange yarn and fabric with strawberries with red yarn.
This time ( = in 2011 ;) ) I made the gift bags of fabric with white and blue squares combined with orange yarn and fabric with strawberries with red yarn.
Ik maak ze om bellen in te verpakken, maar er kan natuurlijk vanalles in.
Wellicht zijn ze ook handig in groter formaat en kan je ze dan vullen met zoete snoepjes, schelpjes, knikkers, knoopjes of wat dan ook.
I make them for wrapping earrings, but you can also use them for other things.
I think you can also make them in a bigger size and use them for candy, shells, marbles, buttons... But I never tried it...
I make them for wrapping earrings, but you can also use them for other things.
I think you can also make them in a bigger size and use them for candy, shells, marbles, buttons... But I never tried it...
BENODIGDHEDEN/SUPPLIES:
- een stuk niet te stugge stof.
- stikgaren ( in een kleur die mooi bij de stof past : liefst 1 die opvalt als je ze gebruikt bij de stof maar er ook bij past )
- een wat dikkere draad om achteraf de sluiting te kunnen naaien
- een goei stofschaar
- een stylo
- een stikmachien
- fabric, preferably cotton or something else 'not to thick'
- sewing thread ( I prefer a color that is 'visible' and that matches with the fabric )
- Thin yarn in a matching and contrasting color. ( I use puppets eldorado from Veritas )
- fabric scissors
- something to write on fabric
- sewing machine
- a needle
- a small plate or another round object that you can use as a template. My plate measures 16 cm and that's the minimum size : with that size you really have small bags !
- een stuk niet te stugge stof.
- stikgaren ( in een kleur die mooi bij de stof past : liefst 1 die opvalt als je ze gebruikt bij de stof maar er ook bij past )
- een wat dikkere draad om achteraf de sluiting te kunnen naaien
- een goei stofschaar
- een stylo
- een stikmachien
- naald
- een bordje of iets anders cirkelvormig. Ik gebruikte een 'ondertaske' met een doorsnede van 16 cm. Veel kleiner zou ik niet gaan : dit zijn echt kleine zakjes !
- fabric, preferably cotton or something else 'not to thick'
- sewing thread ( I prefer a color that is 'visible' and that matches with the fabric )
- Thin yarn in a matching and contrasting color. ( I use puppets eldorado from Veritas )
- fabric scissors
- something to write on fabric
- sewing machine
- a needle
- a small plate or another round object that you can use as a template. My plate measures 16 cm and that's the minimum size : with that size you really have small bags !
ZO MAAK JE HET/TUTORIAL
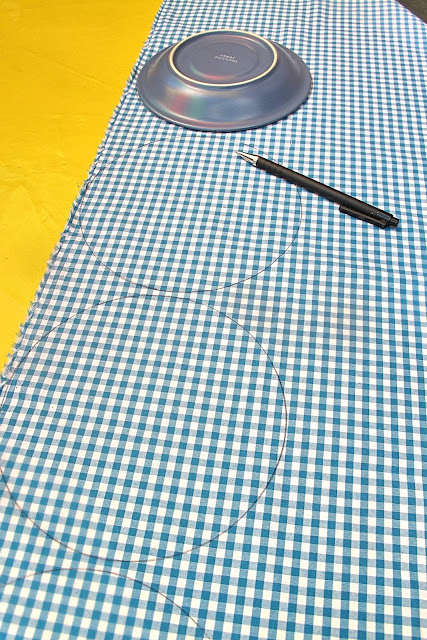
1. Gebruik je bordje als sjabloon en teken met een balpen de cirkels op je stof.
Ik gebruik daar een balpen voor omdat dat beter zichtbaar is dan kleermakerskrijt .
Bij deze zakjes kan dat geen kwaad.1. Use the plate as a template and draw circles on the fabric.
2. Knip de cirkels uit.
2. Cut the circles.
3. Zigzag een aantal keren met contrasterend stikgaren de cirkels rond.
Ik deed het 1 tot 3 keer : hoe vaker je rond gaat, hoe duidelijker het contrasterend stiksel, maar ook hoe stugger de rand wordt.
Gewoon wat experimenteren dus ...
Bij sommige stoffen gaat de stof dan wat golven maar dat is niet erg....
3. Choose a contrasting colored sewing thread and sew a zigzag stitch at the edge of the circles, do this 1 to 3 times ...
I prefer to do it 3 times : the more times you go around the edge of the fabric , the more visible the stitches are and that's pretty.
But when you do it too often, the piece of fabric looses it's flexibility.
Sometimes the fabric will show some 'waves' after sewing it, but that's no problem.
4. Naai met een stevigere draad met de hand een kleine centimeter naast de rand een kettingsteek.
Dat moet niet 100% strak zijn , maar probeer het wel zo gelijkmatig mogelijk te doen.
4. take a piece of yarn in a contrasting color and a needle and sew - by hand - a running stitch about 1 cm from the edge.
5. Knoop, als je rond bent, beide uiteinden samen.
5. Make a tie in the loose ends when you completed the circle.
6. En trek aan het koordje om er een zakje van te maken ...
6. And pull the string to close the bag...
Schoon hé !
Aren't they cute ?
meer Engelse tuts via deze tag
more English tuts here
Lees dit voor mijn regels rond gebruik en copyright voor mijn ontwerpen/ More info about my rules for copyright on my designs.


What a cute idea!!
BeantwoordenVerwijderenyour photos and projects are delicious.
BeantwoordenVerwijderenthanks!
VerwijderenThese are really cute!
BeantwoordenVerwijderenThese are very cute. Your instructions are very good. Even I could make these :)
BeantwoordenVerwijderenschattig!
BeantwoordenVerwijderenOh zo schattig.
BeantwoordenVerwijderen(heb je toegevoegd aan me bloglijstje, kom hier graag lezen)
tof !
VerwijderenLeuk!!
BeantwoordenVerwijderen