
Ik vertaal vandaag deze tutorial van in 2011. Ik maakte toen placemats van denim en ze worden nog altijd driftig gebruikt. Ze komen enkele keren per week op tafel en ze doen nog altijd hun ding en zijn nog steeds in goede staat. En ik vind ze ook nog altijd mooi.
Today I translate this tutorial from 2011. Back then I made some placemats from denim and I still use them a few ties a week; They are still in a good condition, and I still like them.
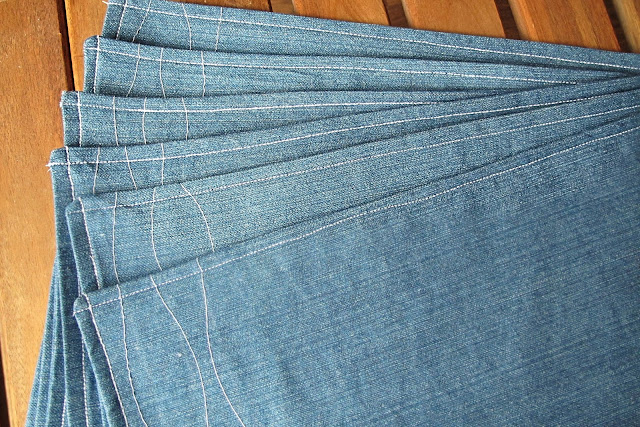
Benodigdheden/material
- stof /fabric
De afmeting is afhankelijk van de hoeveelheid placemats die je gaat maken en van de grootte van je placemats.
Ik maakte er 6 van 29 op 44 centimeter.En ik had stof van 1,5 op 2 meter...
Ik heb dus nog een beetje over...
The amount depends on how many placemats you want to make and how big they’ll be.
I made 6 placemats measuring 29 by 44 cm.
I used a piece of fabric of about 1.5 by 2 meters… so I still had a bit left over.
- stikgaren/sewing threadIn een kleurtje dat bij je jeans past.
Ik koos voor wit.
Maar rood, oranje, beige, bruin ... kunnen ook wel ...
Eigenlijk kunnen alle kleuren wel bij jeans....
In a color that matches your denim.
I chose white, but red, orange, beige, brown… all work nicely too.
Honestly, almost any color goes well with denim.
- naaimachine/sewing machine
Ok, het kan ook met de hand...
Als je veel geduld hebt...Liever met de machine bij mij dus :).
Yes, you can sew everything by hand…
If you have a lot of patience…
I definitely prefer using a machine :).
Ik weet niet of het met een gewone naald ook gaat, maar een jeansnaald is scherper en dat is bij zo'n stof toch wel goed.
I’m not sure if a regular needle would work just as well, but a denim needle is sharper—and that really helps with this kind of fabric.
- goede stofschaar/good fabric scissors
- kleermakerskrijt of een balpen/tailor’s chalk or a pen
- meetlat/ruler
- kopspelden/pins

Hoe maak je het/DIY


3. Stik de decoratie/Stitch the decoration

- goede stofschaar/good fabric scissors
- kleermakerskrijt of een balpen/tailor’s chalk or a pen
- meetlat/ruler
- kopspelden/pins
- lintmeter/measuring tape
- strijkijzer/iron

1. Teken de stukken stof af en knip ze/Draw and cut your fabric pieces
Ik heb zelf als basis een plastieken placemat gebruikt die ik nog had liggen en die was 44 cm op 29 cm.Teken per placemat dat je wil maken 2 stukken van die afmeting af en zorg voor minstens 1 cm extra aan elke kant voor de naden.
Teken dat af aan de slechte kant.
Ik gebruikte daarvoor een gewone balpen omdat dat duidelijker zichtbaar is en correcter werkt.
En op jeans aan de binnenkant kan dat wel.
Zorg dat elk stuk in dezelfde richting op je stof staat : jeans heeft een ' lijnenpartoon' en als je het éne dwars knipt van het andere, zie je dat.
Knip tenslotte de stukken stof uit.
I used a plastic placemat I already had as a base, measuring 44 by 29 cm.
For each placemat, draw two pieces in that size, adding at least 1 cm extra on each side for seam allowance.
Draw everything on the wrong side of the fabric.
I used a regular ballpoint pen because it shows up clearly and works precisely—and on the inside of denim, that’s perfectly fine.
Make sure all pieces are cut in the same direction: denim has a subtle “grain” or line pattern, and if you cut one piece across the grain and another along it, you’ll see the difference.
Then cut out all your pieces.
Negeer de uitgeknipte hoekjes bij mij : dat was niet nodig namelijk, ik heb het vervolgens anders aangepakt zoals je later kan zien ;)
Ignore the cut-off corners you see in my photos—I ended up changing my approach later on ;)

2. Teken de decoratie met kleermakerskrijt/Draw the decoration with tailor’s chalk
En doe dit op de helft van de lapjes.
Ik heb 3 lijnen getekend, afgemeten op respectievelijk 3, 2 en 2 cm van de zijkant.
Do this on half of your fabric pieces.
I drew 3 lines, measured at 3 cm, 2 cm, and 2 cm from the edge.


Rond de lijnen stikte ik al golvend strepen met de gewone stiksteek op zijn grootst.
Het motief is op elke placemat anders, maar heeft wel dezelfde basis : 3 golvende lijnen rond de getekende strepen.
Along those lines, I sewed wavy lines using a sewing stitch set to the longest stitch length.
Each placemat has a slightly different pattern, but they all follow the same idea: 3 wavy stitched lines along the drawn markings.

4. 1 + 1 = 2
Pin 2 delen - 1 met en 1 zonder decoratie - aan mekaar met de goede kant naar binnen.Pin two pieces together—one with decoration and one without—with the right sides facing inward.


5. Stik de boel aan mekaar/Sew everything together
Ik deed dat met de stiksteek op steekgrootte 2,5 of 3.
Als je wil, kan je ook de zomen nog afwerken met een zigzagsteek, maar omdat die aan de binnenkant zullen zitten heb ik dat zelf niet gedaan...
Belangrijk ! Stik het niet helemaal toe ! Laat een stukje open waardoor je je hand kan steken !!!!!
I used a straight stitch with a stitch length of 2.5 or 3.
If you like, you can finish the edges with a zigzag stitch, but since they’ll be on the inside, I skipped that step.
Important! Don’t sew it completely shut—leave a gap so you can turn it inside out!

6. En nu het hoekjesverhaal.../About those corners…
Om te vermijden dat de hoeken erg dik worden, knip je ze af zoals op deze foto ( en dus niet zoals op alle andere foto's ;) ).
To avoid bulky corners, trim them like shown in this photo
(and not like in my earlier photos 😉).

7. Draai het binnenstebuiten/Turn it inside out
En daar heb je dat gat voor nodig...Zorg dat je de hoekjes goed uitplooit en strijk het geheel goed voor je verder gaat !
Handig is ook om de zomen aan het stukje dat je niet hebt toe gestikt al eens om te strijken,.
That’s what the opening is for.
Make sure to push out the corners neatly and give everything a good press before moving on.
It also helps to already press the seam allowances of the opening inward.


8. Stik de naden aan de goede kant/Topstitch the edges
Op mijn stikmachien staat een 'rode' stiksteek ( Bernina )
Daarmee kan je een stiksteek stikken, maar dan 3-dubbel dik waardoor je een dikkere streep krijgt.
Mijn machien stikt dan als de ' processie van Echternach ' : 2 vooruit, 1 achteruit ...
En ik vind dat hier wel mooi op.
Ik stikte dat op steekgrootte 2,5.My sewing machine (Bernina) has a “red” stitch setting.
It creates a triple stitch, which makes a thicker, more decorative line.
It sews a bit like the “procession of Echternach”: two steps forward, one step back…
I really like how it looks here.
I used a stitch length of 2.5.


Je kan ook het gat waardoor je het binnenste buiten keerde eerst met de hand met een onzichtbare steek toestikken, maar ik heb dat niet gedaan omdat ik er toch langs de goede kant nog eens over zou gaan.
You can close the opening first by hand with an invisible stitch, but I didn’t bother since I was topstitching all around anyway.
9. Strijk de boel nog een keer en klaar is kees!/Give it one final press… and you’re done!
9. Strijk de boel nog een keer en klaar is kees!/Give it one final press… and you’re done!

Zo simpel is dat dus
En als ik dat kan kan iedereen dat!

Hi there. I am visiting from the linkup party Weekend Traffic Jam Reboot. I did not find the translate button. Just seen the denim placemats. My mom made a denim quilt made from jeans. She would visit many thrift stores for old worn jeans. Cut squares from the pant legs. Even cut a square with the back pocket still attached. That quilt is heavy and keeps me cozy warm in the winter!
BeantwoordenVerwijderenHave a fun week.
All the best.
Debra @ Life Captured