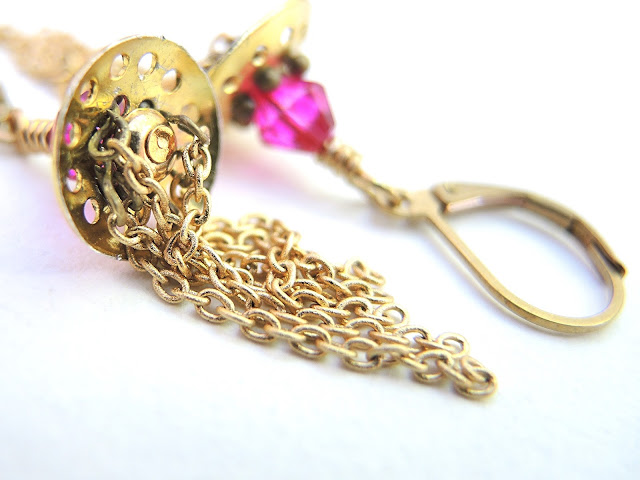
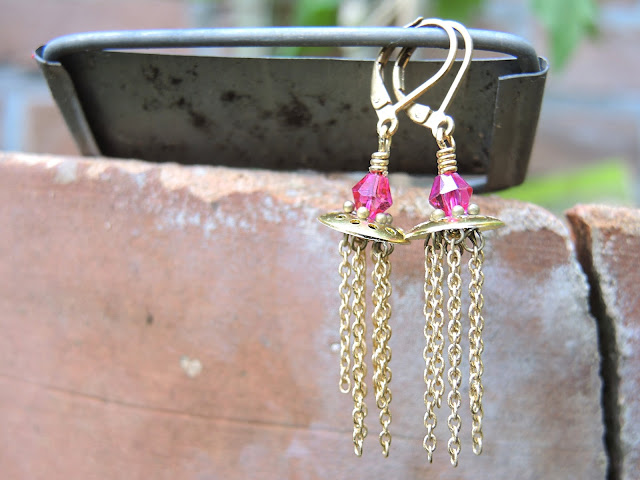
Oorspronkelijk had ik bombastischere bellen in gedachten met dit onderdeel, maar ik was tot dit ontwerp gekomen en vond ze zo al heel erg mooi en dus heb ik ze maar zo gelaten.
Soms is 'less more', nietwaar ?
Voor jullie zelf deze bellen beginnen te maken moet ik er wel bijzeggen dat ze me heel wat bloed, zweet en tranen hebben gekost. Ze zien er niet zo moeilijk uit maar het is echt een heel gepruts om ze in mekaar te krijgen en voor een beginner - zeker een perfectionistische ongeduldige beginner - kan dit best een moeilijk project zijn...
In the beginning I had more' bombastique ' earrings in mind. But when I was in the middle of creating them, I found them already very beautiful the way they were. So I decided to keep them like this.
Sometimes ' less is more', isn't it ?
A warning for those who wants to make them too : Although the project seems very easy to make, it was actually a lot of trouble. Be prepared for that, certainly when you are a very inpatient beginner ...
Ik vertrok met deze bellen vanuit onderdelen voor clipsoorbellen die ik ooit eens op een rommelmarkt vond. Ik heb ze toen aangeschaft in verschillende formaten, ook exemplaren voor broches, maar ik had er nog nooit iets mee gemaakt.
En ik besloot ze nu te gebruiken op een 'oneigenlijke ' manier ...
Ik had namelijk enkel het onderdeeltje met de gaatjes nodig. Voor het clipsje zelf zoek ik wel eens een andere bestemming ...
I started with earring clips with multi hole disc plates, but I only used the multi hole disc plates for this project.
I bought them - in various sizes and also for brooches - some years ago at a flea market and still didn't use them..
I guess I will find another purpose for the remaining pieces of the clipses.
BENODIGDHEDEN/SUPPLIES:
materiaal :
- 2 oorhaakjes
- Per bel 6 stukjes gouden schakelketting met kleine schakels. De schakels moeten wel groot genoeg zijn om er een nietstift doorheen te kunnen steken. Ik gebruikte telkens 3 stukjes van 20 schakels groot en 3 stukjes van 14 schakels lang.
- 2 gefaceteerde tolachtige glaskraaltjes.
- 2 ' zeefjes ' van oorbelclipsen.
- 2 goudkleurige buttonkraaltjes
- 7 nietstiften
gereedschap :
- 2 platbektangen
- 1 rondbektang
- 1 kniptang
material :
- a pair of ear wire
- For each earring : 6 pieces of chain with small links. The links must be wide enough to put some wire through. For each earring I used : 3 pieces of 20 links and 3 pieces of 14 links .
- 2 faceted bicone glass beads
- a pair of ear clips with multi hole disc plates ( we only use the multi hole disc plates )
- 2 glass button beads
- 7 head pins
tools :
- 2 flat nose pliers
- 1 round nose pliers
- 1 cutting pliers
ZO MAAK JE HET /TUTORIAL :
Neem een nietstift en plooi het uiteinde zo'n millimeter of 3 van het bolletje af 90 graden om.
Bend a head pin - 3 mm from the head ball - 90 degrees.
Steek het door 1 van de gaatjes die rond het middelste gaatje van het zeefje staan.
Thread it through one of the holes around the middle hole of the multi holed disc plate.
Dit lijkt misschien niet zo maar door de vorm van het zeefje is dit een moeilijk stukje : plooi het tot een oogje, zo dicht mogelijk tegen het zeefje aan.
Make a loop as close to the mutli hole disc plate as possible.
That may seem easy but it isn't because of the shape of the multi hole disc plate . This is the hard part !
Hang er een stukje ketting aan. Zorg dat het oogje goed afgesloten is en de ketting er niet terug kan afvallen !
Attach a piece of chain. Be sure to close the loop very good to prevent the chain from falling of.
Maak opnieuw een oogje in het gaatje ernaast.
Repeat this in the next hole.
Hang ook daaraan een stukje ketting, van een ander formaat als het stukje dat je daarnet gebruikte.
Again : attach a piece of chain, but this time use a piece of chain with a different size as the one before.
Herhaal dit keer op keer.
Repeat it again an again.
Tot je helemaal rond bent...
Until every hole in that circle is covered.
Bovenaan ziet dat er zo uit ...
From above it looks like this :
Of zo ...
Or like this :
Pak de laatste nietstift en rijg het buttonkraaltje aan .
Take the last head pin and thread the button bead.
Steek dat door het middelste gaatje van het zeefje, dan heb je dit ...
Pull it through the middle hole of the multi hole disc plate , then it looks like this :
Rijg het tolvormige kraaltje aan : het zal mooi passen tussen de bolletjes van de nietstiften.
Thread the bicone bead , it will fit very nicely between the head balls of the head pins .
Maak er een gesloten oogje aan. Hoe je dat doet kan je hier lezen.
Make a wired loop as shown here.
Nu nog een haakje en bel 1 is klaar...
Attach ear wire and earring number one is ready...
En vermits je met een hoop gepruts al zover ben geraakt dat je al 1 bel hebt, kan je het wel aan om er nog eentje te maken, niet ?
Now you know how to do it, you surely can make a second one ;) .
In eerste instantie wilde ik ook in de buitenste gaatjes nog hangertjes hangen. Maar dat zal voor een andere keer zijn, ik vind dit ontwerp zo al erg mooi.
First I planned to attach bead pendants on the outside holes too, but I preferred the earrings the way they look now. Maybe some other time ;) .
Meer juwelentutorials hier ...
More jewelry tutorials here ...
Ik heb een reclame- en sponsorvrije blog en kreeg niks in ruil voor de aankoop van deze kralen. Ik kocht ze op eigen initiatief en betaalde de volle pot. / I have an add- and sponsor free blog and I bought these beads at full price at my own initiative and without any form of compensation for writing this blog post.
Lees dit voor mijn regels rond gebruik en copyright voor mijn ontwerpen/ More info about my rules for copyright on my designs.


Wat een super mooie en unieke oorbellen heb je gemaakt!
BeantwoordenVerwijderen